CIS*4820 Juicing up your GameDev Skills

Earlier this year , I ended up doing a presentation for the University of Guelph’s CIS*4820 (Game Programming) course. During the talk, I shared a number of tips and tricks on how to make games stand out by adding “Juice” to them. Inspired by a great talk from 2013 about this (Juice it or lose it) where two game developers showed how a simple game of Breakout could get a lot of eye-candy effects that would make the gameplay seem a lot more exciting, I wanted to give the students a chance to see how some of these things would be achieved in practice. My hope was that by sharing with them that I am an alumni it would drive their interest even further, as there are some topics which I learned back at The University of Guelph that are still relevant to my everyday work (i.e. finite state machines).

For the talk, I created a number of examples which would individually showcase how to add “Juice” to your game. These included some simple types of scaling, jelly effects, how to slow down things using time dilation and how to do a ghosting effect for a character.

The Ghosting effect is visually appealing and naturally got the most interest during the talk, which is why I’d like to break it down further here.

While investigating how to do the effect, I ran into a number of implementations and realized that the most common pattern for it would be to spawn GameObject copies with a certain frame offset.  However, one of the things that I have become wary of during the time I’ve worked at Unity is that spawning GameObjects in the middle of your game is not the best thing to do. There are various reasons, and some work arounds, but my biggest concern is the unnecessary allocations that spawning a GameObject implies. Other considerations being:

  • Allocating one Sprite Renderer per instanced GameObject
  • GameObject lifecycle callbacks during instantiation (i.e. Awake() and friends)
    • Transform registration 

Naturally, we can get around the allocation penalty by using a Memory Pool, but again, that’s working around the issue and not addressing the fundamental problem which is, why would a full GameObject need to be instantiated for a temporary and non-interactive copy of the character?

Particles to the rescue

After thinking sometime about rolling out my own solution for this, and implementing some half-baked sprite sheet with quad creation, I realized that the obvious and battle-tested solution to this would be to just use Unity’s particle system. Also, this technique would be easy to share with the students as they would not need to dig through code I wrote and instead they’d be able to use an already well established particle editing workflow.

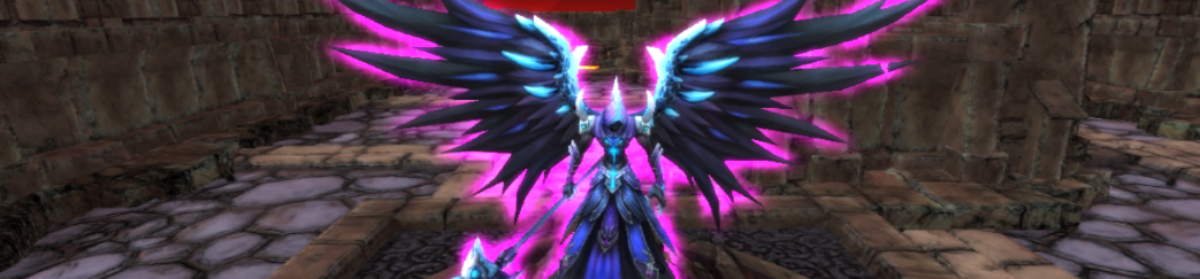
To achieve this, I took the base sprite, added it to a particle system and tweaked various settings across its modules to spawn frame specific versions of the character and let the particles fade out over time. 

This is what the end result looked like:

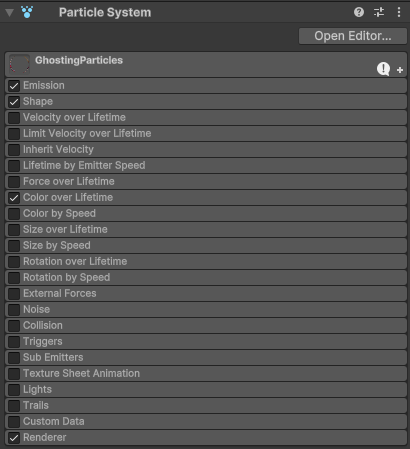
The following modules are enabled in the particle system:

  • Emission
  • Shape
  • Color over Lifetime
  • Renderer

As can be seen below:

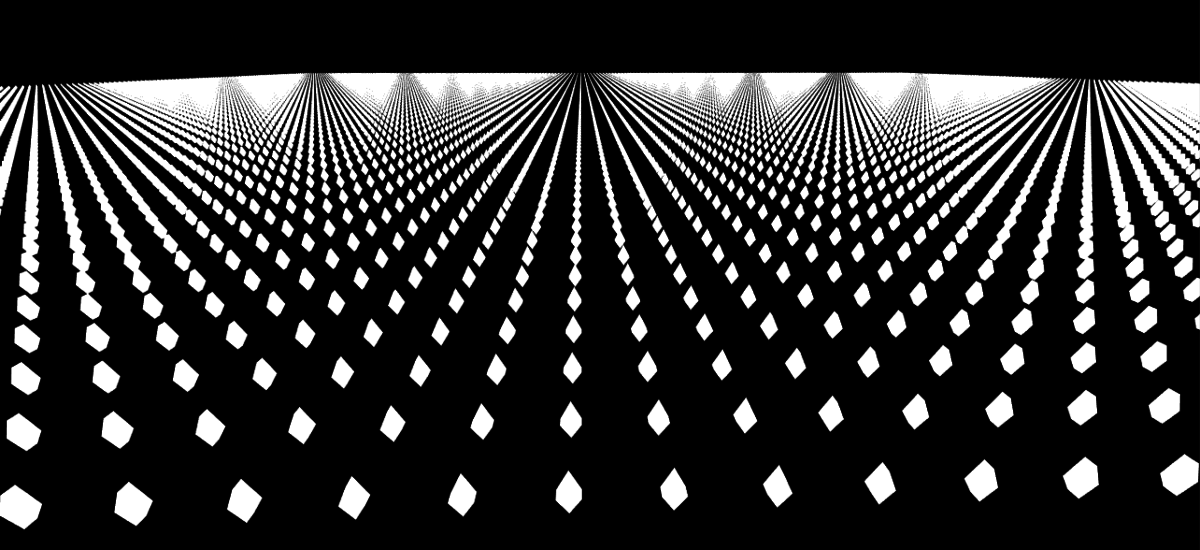
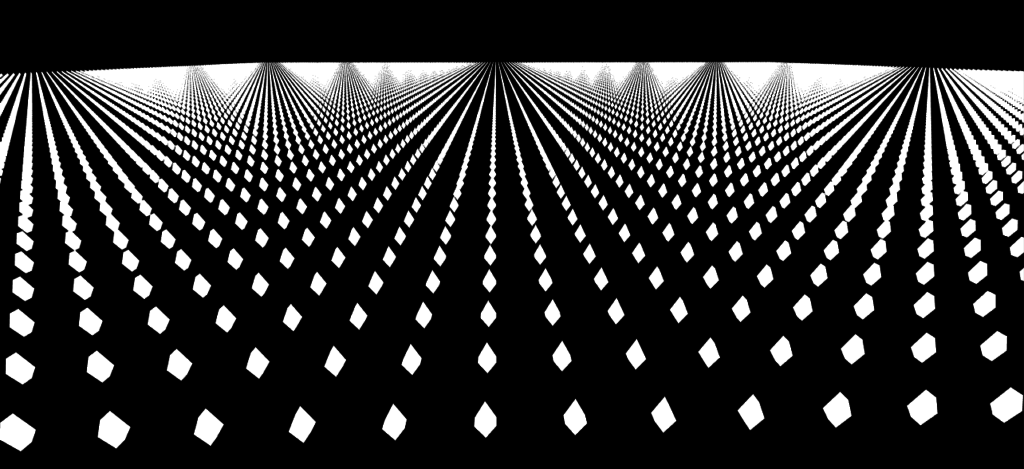
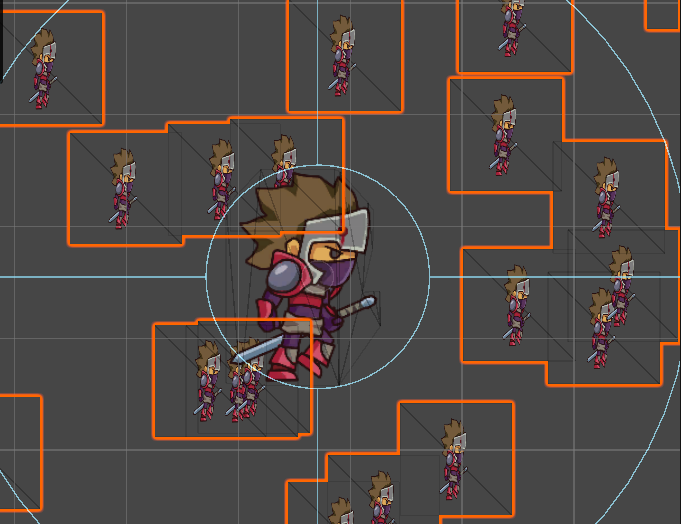
First, its important to get the scale correct. By default, a particle system will emit particles out in a radial fashion, so if you have a material with your texture, you’ll end up with this as a starting point:

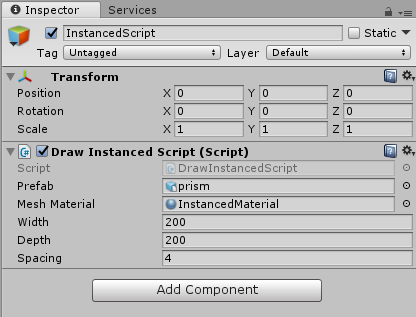
To get this under control, you’ll need to change the following properties:

  • Start Size: 2.5
  • Start Speed: 0
  • Start Lifetime: 0.25
  • Emission
    • Rate over time: 0 -> This will shut off the particle emission completely, allow us to control it via script

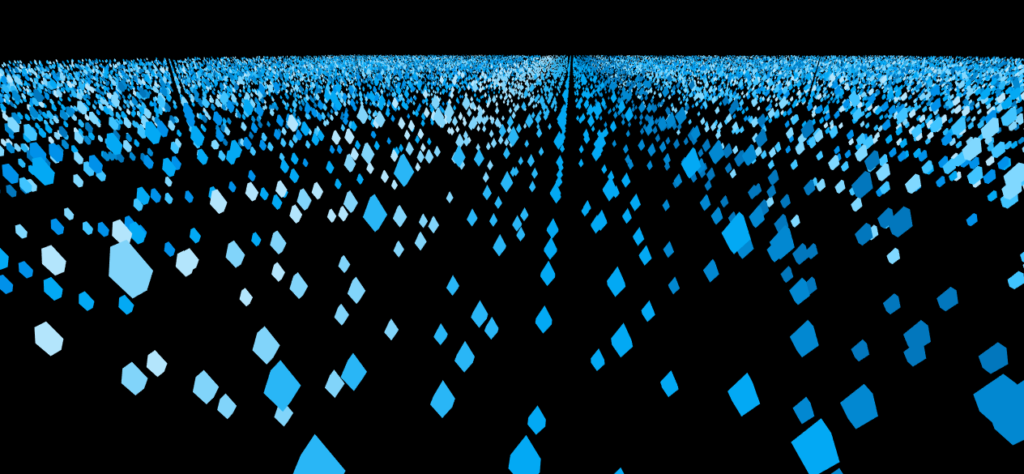
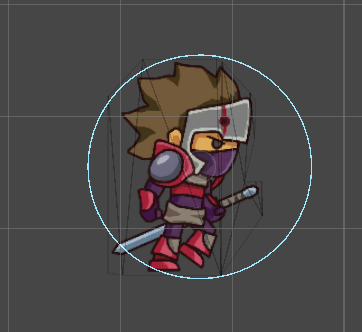
At this point, all you should see is the Particle System’s radius and your character:

The next change is in the Color over lifetime.

The trick here is to use both the automated color change to you advantage and have a start and end color, together with a start/end alpha, so the Color slider looks something like this:

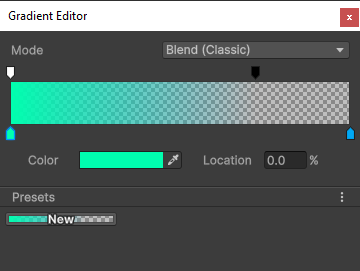
The top represents the alpha value (which starts at 100% with the white color, and ends at 0% with the black color) and the bottom represents the start and end colors (i.e. greenish to blue). The blend works quite well, and the Particle System will handle this over the specified Start Lifetime of your particle which was one of the first things we changed. Having set the Start Lifetime to 0.25s means the system will interpolate their color values over that amount of time.

Emitting Particles via script

The script here is kept simple on purpose, to show the bare minimum that would be needed for making the effect start. This is where we begin spawning of the particles:


else if(m_State == PlayerState.StateDash)
{
    // Do effect
    float directionMultiplier = (m_Direction == Direction.Right) ? 1.0f : -1.0f;
    Vector2 pos = transform.position;
    pos.x += (m_DashSpeed * directionMultiplier) * Time.deltaTime;
    transform.position = pos;

    if (Time.realtimeSinceStartup - m_LastEmit > m_EmitDelay)
    {
        EmitParams emitParams = new EmitParams();
        emitParams.position = transform.position;
        m_GhostParticleSystem.Emit(emitParams, 1);
        m_LastEmit = Time.realtimeSinceStartup;
    }

    if (Time.realtimeSinceStartup - m_StartDash > m_DashDuration)
    {
        m_State = PlayerState.StateRunning;
    }
}

There are a couple things that need to happen:

  • The player must be in a  “Dash” state (explained next)
  • We keep track of when the last particle was emitted, and if enough time has passed we emit one more (and reset the duration).
  • Once we have dashed “long enough” we go back to the running state for the player, so another dash can be potentially triggered.

That’s almost all of it, just one last piece needed to make sure the particles are emitted in the correct direction, and the last bit of setup code for time tracking goes here:


if(Input.GetKeyDown(KeyCode.Space))
{
   m_State = PlayerState.StateDash;
   m_StartDash = Time.realtimeSinceStartup;


   var particleRenderer = m_GhostParticleSystem.GetComponent<ParticleSystemRenderer>();


   particleRenderer.material.mainTexture = m_SpriteRenderer.sprite.texture;


   EmitParams emitParams = new EmitParams();
   emitParams.position = transform.position;


   float direction = (m_Direction == Direction.Right) ? 0 : 1.0f;
   particleRenderer.flip = new Vector3 (direction, 0, 0);
   m_GhostParticleSystem.Emit(emitParams, 1);
   m_LastEmit = Time.realtimeSinceStartup;
}

In this code block, once we press the Space Bar, we’ll signal to our MonoBehaviour that we need to start the dash effect. To do this, we:

  • Change the player’s state to “Dash”
  • Figure out which direction the player is facing, and flip the particle renderer accordingly
  • We emit a single particle, and record the time for when our Dash state begins
  • The particle we emit is a snapshot of where in the sprite sheet the player’s animation is, so we repeat that image as many times as our settings allow.

Finally we can bring it all together, and we have a simple ghosting effect with much less overhead than spawning a large amount of GameObjects and reducing memory overhead while doing it too. 

Overall, I was quite happy that I was able to present to a group of students, and that we spent a good amount of time in the Q&A part of the talk discussing various aspects of Game Development, but also about the games industry in general.

Last but not least, I’d like to thank Dennis Nikitenko for letting me present in his class, and Chandler Gray for bringing the two of us together so we could make this happen!

Until next time 😀

Instanced Drawing With Unity, Part 1

Back in 2017, during the Unite Austin presentation, Unity revealed a fully performance oriented approach to programming, namely the Entity Component System (ECS). In there, the show case demonstrated that they could place 100,000 units on screen with logic and graphics and run the code at over 30 FPS. This was really impressive, but what was more impressive was that they started open sourcing a lot of it.

ECS at Unity Austin 2017

Having looked into the ECS samples I noticed that the way the boids demo was being rendered was using Graphics.DrawMeshInstanced() as you can see down here:

This was really interesting as it showed that a large number of meshes could be drawn with very little overhead compared to having each one be an individual object.

What is Instanced Drawing

Generally speaking, if you wanted to draw a large forest or a number of buildings, this could be a way. You draw the same mesh multiple times, in a single command, with some differing parameters to reduce repetition (changing color, or even animation frames for meshes).

Unity introduced this in Unity 5.4 as a very welcome feature!

There’s a few samples out there for how to use Graphics.DrawMeshInstanced(), but I’d like to try and present a minimal code sample for what you need in case you want to start looking into Instanced Drawing.

Instanced Shader Properties

First, you’ll need a shader that’s set up to work with instancing.

This is achieved by adding a number of instancing specific properties to it, namely:

#pragma multi_compile_instancing
UNITY_VERTEX_INPUT_INSTANCE_ID
UNITY_SETUP_INSTANCE_ID(v);
UNITY_INSTANCING_BUFFER_START(Props)
UNITY_DEFINE_INSTANCED_PROP(float4, _Color)
UNITY_INSTANCING_BUFFER_END(Props)
UNITY_ACCESS_INSTANCED_PROP(arrayName, color)

From the Unity Documentation on GPU Instancing:

#pragma multi_compile_instancing

Use this to instruct Unity to generate instancing variants. It is not necessary for surface Shaders.

UNITY_VERTEX_INPUT_INSTANCE_ID

Use this in the vertex Shader input/output structure to define an instance ID. See SV_InstanceID for more information.

UNITY_SETUP_INSTANCE_ID(v);

Use this to make the instance ID accessible to Shader functions. It must be used at the very beginning of a vertex Shader, and is optional for fragment Shaders.

UNITY_INSTANCING_BUFFER_START(name)
UNITY_INSTANCING_BUFFER_END(name)

Every per-instance property must be defined in a specially named constant buffer. Use this pair of macros to wrap the properties you want to be made unique to each instance.

UNITY_DEFINE_INSTANCED_PROP(float4, _Color)

Use this to define a per-instance Shader property with a type and a name. In this example, the _Color property is unique.

UNITY_ACCESS_INSTANCED_PROP(arrayName, color)

Use this to access a per-instance Shader property declared in an instancing constant buffer. It uses an instance ID to index into the instance data array. The arrayName in the macro must match the one in UNITY_INSTANCING_BUFFER_END(name) macro.

Now that the minimum amount of properties needed to have a shader that is compatible with instancing have been identified, its time to put them to use in a shader!

Creating the shader

Here is a shader that uses the properties mentioned above. Its also available on GitHub under the MinimalInstancing project

MinimalInstanced Shader

Shader "Custom/MinimalInstancedShader"
{
    Properties
    {
        _Color("Color", Color) = (1, 1, 1, 1)
    }

    SubShader
    {
        Pass
        {
            CGPROGRAM

            #pragma vertex vert
            #pragma fragment frag
            #pragma multi_compile_instancing

            #include "UnityCG.cginc"

            struct appdata
            {
                float4 vertex : POSITION;
                UNITY_VERTEX_INPUT_INSTANCE_ID
            };

            struct v2f
            {
                float4 vertex : SV_POSITION;
            };

            UNITY_INSTANCING_BUFFER_START(Props)
            UNITY_DEFINE_INSTANCED_PROP(float4, _Color)
            UNITY_INSTANCING_BUFFER_END(Props)

            v2f vert(appdata v)
            {
                v2f o;
                UNITY_SETUP_INSTANCE_ID(v);            
                o.vertex = UnityObjectToClipPos(v.vertex);
                return o;
            }

            fixed4 frag(v2f i) : SV_Target
            {
                float4 color = UNITY_ACCESS_INSTANCED_PROP(Props, _Color);
                return color;
            }
            ENDCG
        }
    }
}

Graphics.DrawMeshInstanced Script

Next, we’ll need a script that uses the shader combined with Graphics.DrawInstanced() to really show off just how much geometry you can draw with this API!

We need to use a material that uses the shader we created above, and we also need a model to draw, in this case a prefab I created with ProBuilder.

Draw Mesh Instanced gotchas

When it comes to actually invoking Graphics.DrawMeshInstanced() there are a couple things to point out:

    1. An Array of Matrix4x4 are required. These matrices represent where the Meshes are to be drawn (translation, rotation & scale).

    2. The Matrix4x4 array is limited to 1023 entries, so as the number of entities goes up, we’ll need to create more batches which could hinder performance, though 40,000 instances runs without a hitch.

    3. The desired length of the Array is also required as a separate variable, but it does not need to match the 1023 limit as you can see in the code below.

using UnityEngine;

public class DrawInstancedScript : MonoBehaviour
{
    const float BATCH_MAX_FLOAT = 1023f;
    const int BATCH_MAX = 1023;

    public GameObject prefab;
    public Material meshMaterial;
    public int width;
    public int depth;    
    public float spacing;
   
    private MeshFilter mMeshFilter;
    private MeshRenderer mMeshRenderer;
    private Matrix4x4[] matrices;

    void Start ()
    {
        mMeshFilter = prefab.GetComponent<MeshFilter>();
        mMeshRenderer = prefab.GetComponent<MeshRenderer>();
       
        InitData();
    }

    private void InitData()
    {
        int count = width * depth;

        matrices = new Matrix4x4[count];
        Vector3 pos = new Vector3();
        Vector3 scale = new Vector3(1, 1, 1);

        for (int i = 0; i < width; ++i)
        {
            for (int j = 0; j < depth; ++j)
            {
                int idx = i * depth + j;

                matrices[idx] = Matrix4x4.identity;

                pos.x = i * spacing;
                pos.y = 0;
                pos.z = j * spacing;

                matrices[idx].SetTRS(pos, Quaternion.identity, scale);
            }
        }
    }

    void Update ()
    {
        int total = width * depth;
        int batches = Mathf.CeilToInt(total / BATCH_MAX_FLOAT);

        for (int i = 0; i < batches; ++i)
        {
            int batchCount = Mathf.Min(BATCH_MAX, total - (BATCH_MAX * i));
            int start = Mathf.Max(0, (i - 1) * BATCH_MAX);

            Matrix4x4[] batchedMatrices = GetBatchedMatrices(start, batchCount);
            Graphics.DrawMeshInstanced(mMeshFilter.sharedMesh, 0, meshMaterial, batchedMatrices, batchCount);
        }
    }

    private Matrix4x4[] GetBatchedMatrices(int offset, int batchCount)
    {
        Matrix4x4[] batchedMatrices = new Matrix4x4[batchCount];

        for(int i = 0; i < batchCount; ++i)
        {
            batchedMatrices[i] = matrices[i + offset];
        }

        return batchedMatrices;
    }
}

DrawInstanced Script setup

Just one more step before we can see the result, which is assigning values to the DrawInstancedScript

For this demo, I went with a 200×200 sized grid for a total of 40,000 prisms being drawn on screen, with these settings:

With just enough spacing to be able to tell that the prisms are individual

Once  we have this all set up, this is what we can see

Batching 40,000 prisms

This project (as well as the upcoming Part02) are available on GitHub:

https://github.com/JavDevGames/MinimalInstancing

In Part 2, I’ll show you how to use the Material Property Block combined with DrawMeshInstanced in order to create a scene with more variation, and here’s a sneak peak into it:

Batching 40,000 prisms

You can always follow me on Twitter @JavDev